With my eight years of experience in SEO and two years of guest posting in various countries and languages on the topic of cannabis, I want to offer you a specialist view of the Adsy platform, unconstrained by the need to sell an article.
Working with guest posts in gray niches, especially in the cannabis sector, has shown that out of 100 domains, only 18 in the US and UK have been successfully hosted. At the end of 2024, the addition of a filter made guest posting for the gray niche a little easier.
This review on Adsy reflects my personal experience with the platform as an SEO specialist in the cannabis industry. I hope my experience helps you make an informed choice of platform to promote your content. If you have any questions or suggestions email me.
This review examines the iCopify.co platform, which has established itself as one of the most stable link building platforms, particularly in the cannabis and CBD sectors. Over a year, I successfully placed links on only three sites, highlighting the platform’s selective effectiveness.

The platform features a broker rating who has completed over 100 tasks with a completion rate of at least 75%. However, to avoid misunderstandings, it is crucial to be extremely careful when checking the finished texts.
Here is a detailed article "Cannabis SEO: How to Get High-Quality Backlinks?" that will tell you about many nuances of choosing backlinks and exchanges
Here is a detailed article "How to get cheaper SEO backlinks?"
Despite some difficulties and limited effectiveness in placement, iCopify.co can be useful for those looking for specialized platforms in the cannabis and CBD niche. It is important to approach the process patiently and monitor each step of the work with the platform meticulously.
If your project requires large volumes of links each month, especially in the cannabis field where specific request filters are lacking, the platform may not meet your needs.
Thus, iCopify.co represents a reliable tool for link placement but requires a thoughtful and careful approach to utilizing its capabilities and functions.
View-Page-Source.com is a service that empowers users, ranging from web developers to curious learners, to easily view and analyze the source code of any webpage.
Accessibility of Source Code: The primary feature of View-Page-Source.com is its ability to quickly display the HTML source code of any public web page. This is especially useful for educational purposes, debugging, and competitive analysis.
User-Friendly Interface: The platform is designed with simplicity in mind, ensuring that even users with minimal technical knowledge can navigate and use the service effectively. The interface allows users to simply enter a URL to view the source code of the corresponding page.
No Installation Required: Unlike many development tools, View-Page-Source.com does not require any installation. It runs directly from the browser, making it accessible from anywhere and at any time without the need for complex setups or configurations.
Educational Tool: For individuals learning web development, the ability to inspect the HTML, CSS, and sometimes JavaScript of a website provides a practical insight into how various elements are implemented in real-world scenarios.
Debugging: Web developers can use this tool to quickly locate and diagnose problems in the HTML structure of a page, which can be crucial for troubleshooting website issues.
Competitive Analysis: Businesses and digital marketers can analyze competitors’ websites, gaining insights into how they structure their content, implement SEO strategies, and more, which can inform their own web strategies.
How It Works
Enter the URL: Users start by entering the URL of the webpage they wish to inspect into the provided field.
View Source Code: The service then retrieves and displays the source code in a clean, readable format. It also highlights different elements and tags for easier analysis.
Analyze and Learn: Users can scroll through the code, copy parts of it, or even save the entire source for further examination or educational purposes.
Security and Privacy
View-Page-Source.com ensures that user privacy is maintained, as it does not store the URLs entered by users or any other personal data. The interaction with the service is secure, providing users with peace of mind while they explore or analyze web content.
Table of contents
The cannabis industry, especially following legalization in a number of countries and states, continues to develop rapidly. In countries like Canada and Uruguay, as well as in some U.S. states such as Colorado, California, and Washington, the legalization of recreational and medical cannabis has led to a significant increase in interest in online content related to marijuana. 
This content includes topics such as cultivation, medical use, and cannabis-based products like CBD. For webmasters managing cannabis-themed sites, backlinks remain a crucial element of SEO promotion, helping to enhance site visibility in search engines.
Services such as Links-Stream can be helpful for promoting cannabis content, but there are certain nuances to consider when dealing with this topic.If you want to get discounts use my links and codes:
https://office.links-stream.com/registration/pDFEf124 Promo code: pDFEf124
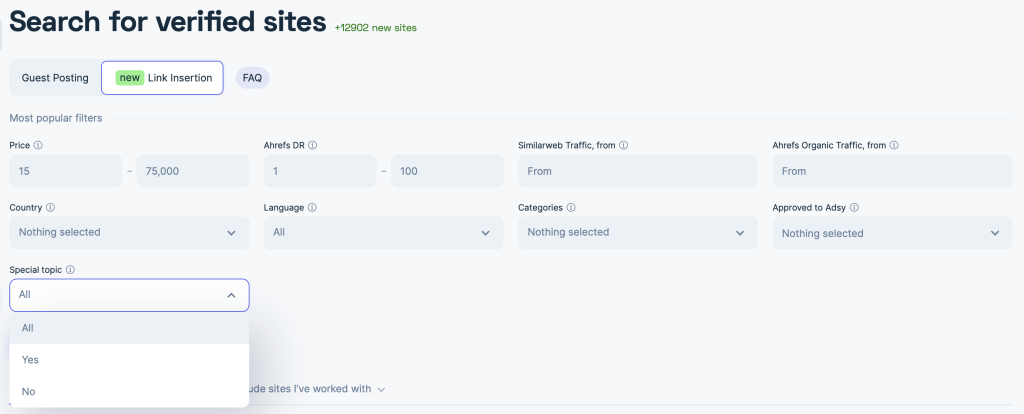
On Links-Stream, there are standard filters for searching domains where links can be placed, but you will not find categories such as cannabis, CBD, or marijuana. This is because the cannabis topic remains controversial in many regions. However, there is an opportunity to place on sites with so-called "Gray theme."
Gray theme refers to content associated with legally controversial or ethically ambiguous topics. It includes sites that do not directly ban discussions on topics like cannabis but do not single them out as a separate category. These sites may accept articles on various topics, where cannabis is organically mentioned. This allows webmasters to promote cannabis-related content without violating explicit platform rules.
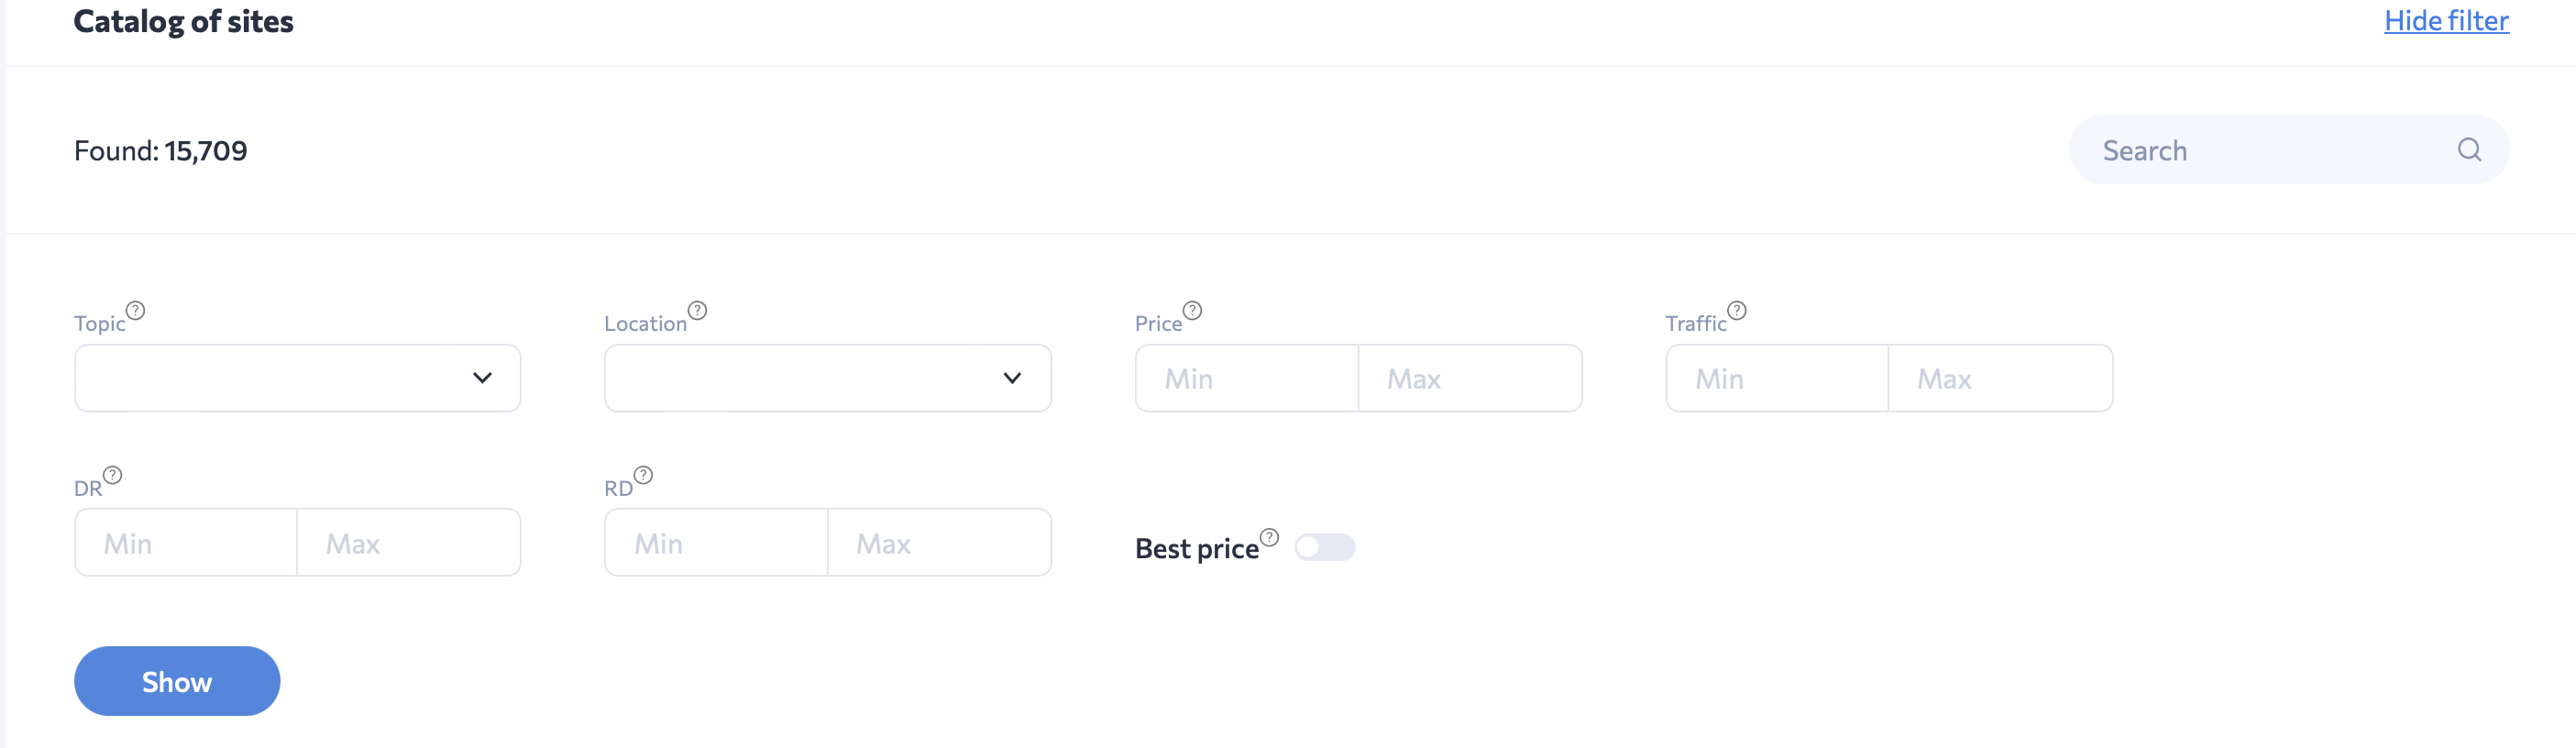
1 One of the main challenges is the limitation of viewing no more than 20 domains on one page, which slows down the analysis process. You cannot see 100 domains on a page immediately.
2 The Links-Stream platform does not allow selecting domains with the "Gray theme" filter. Simply, there is no such filter.
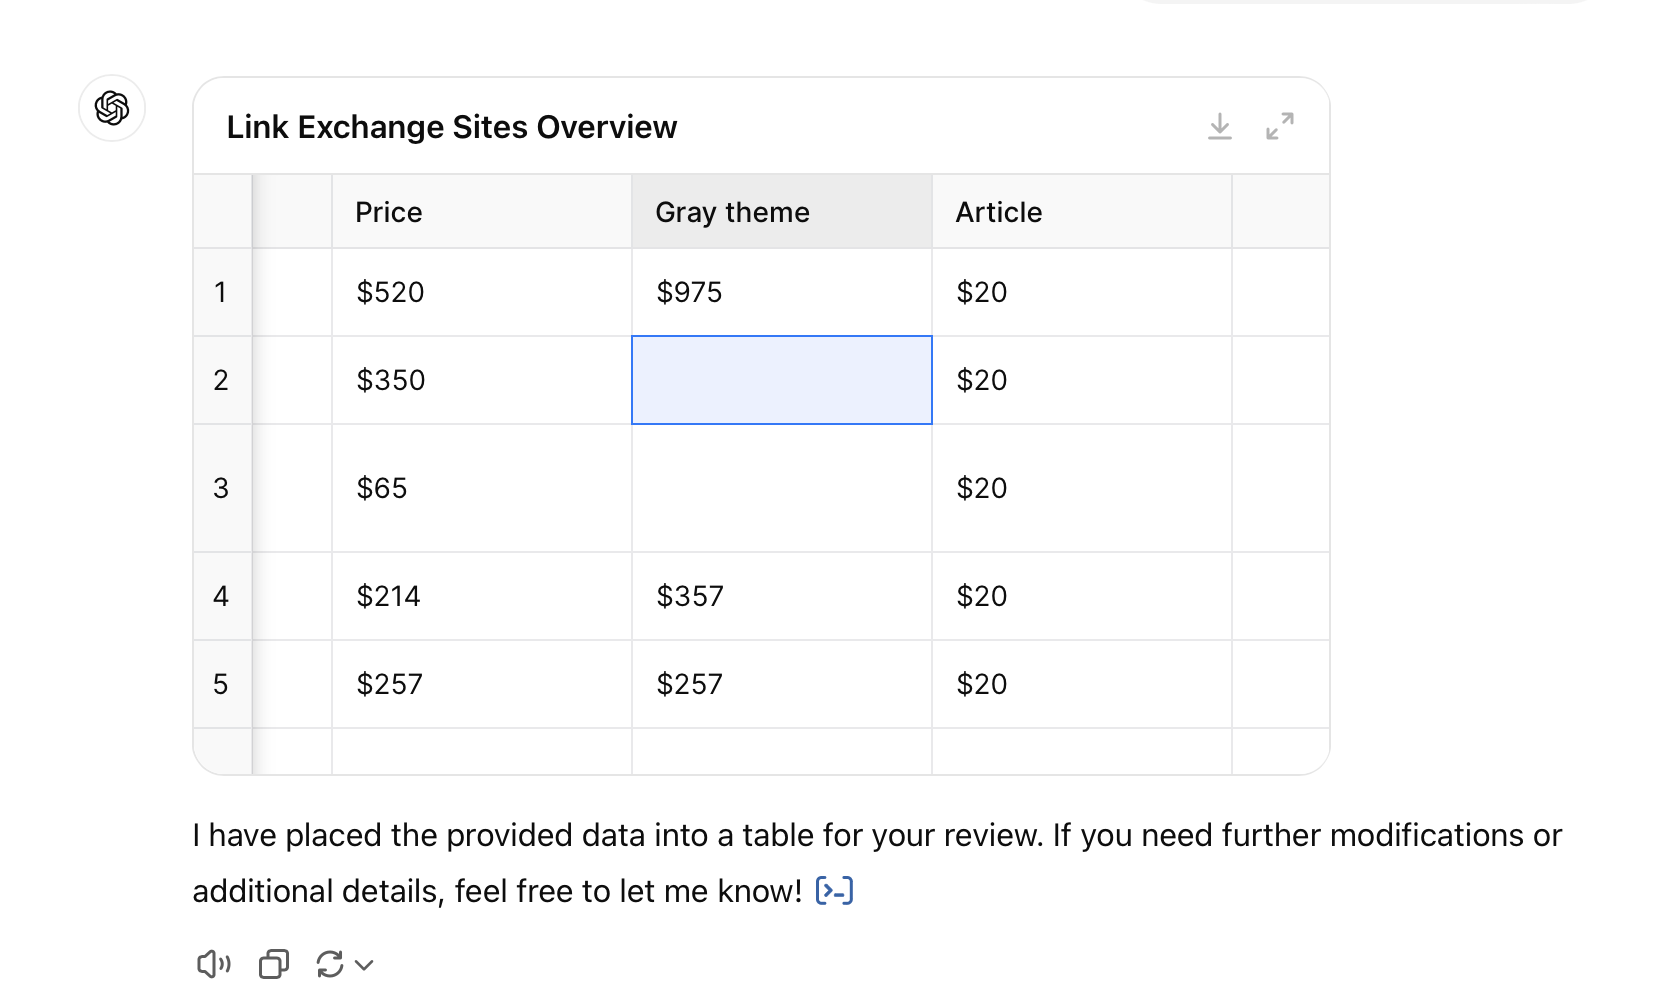
First step: Copy the list/table of domains into GPT chat. It will look something like this:

Second step: Write in the chat, "Make this a table."
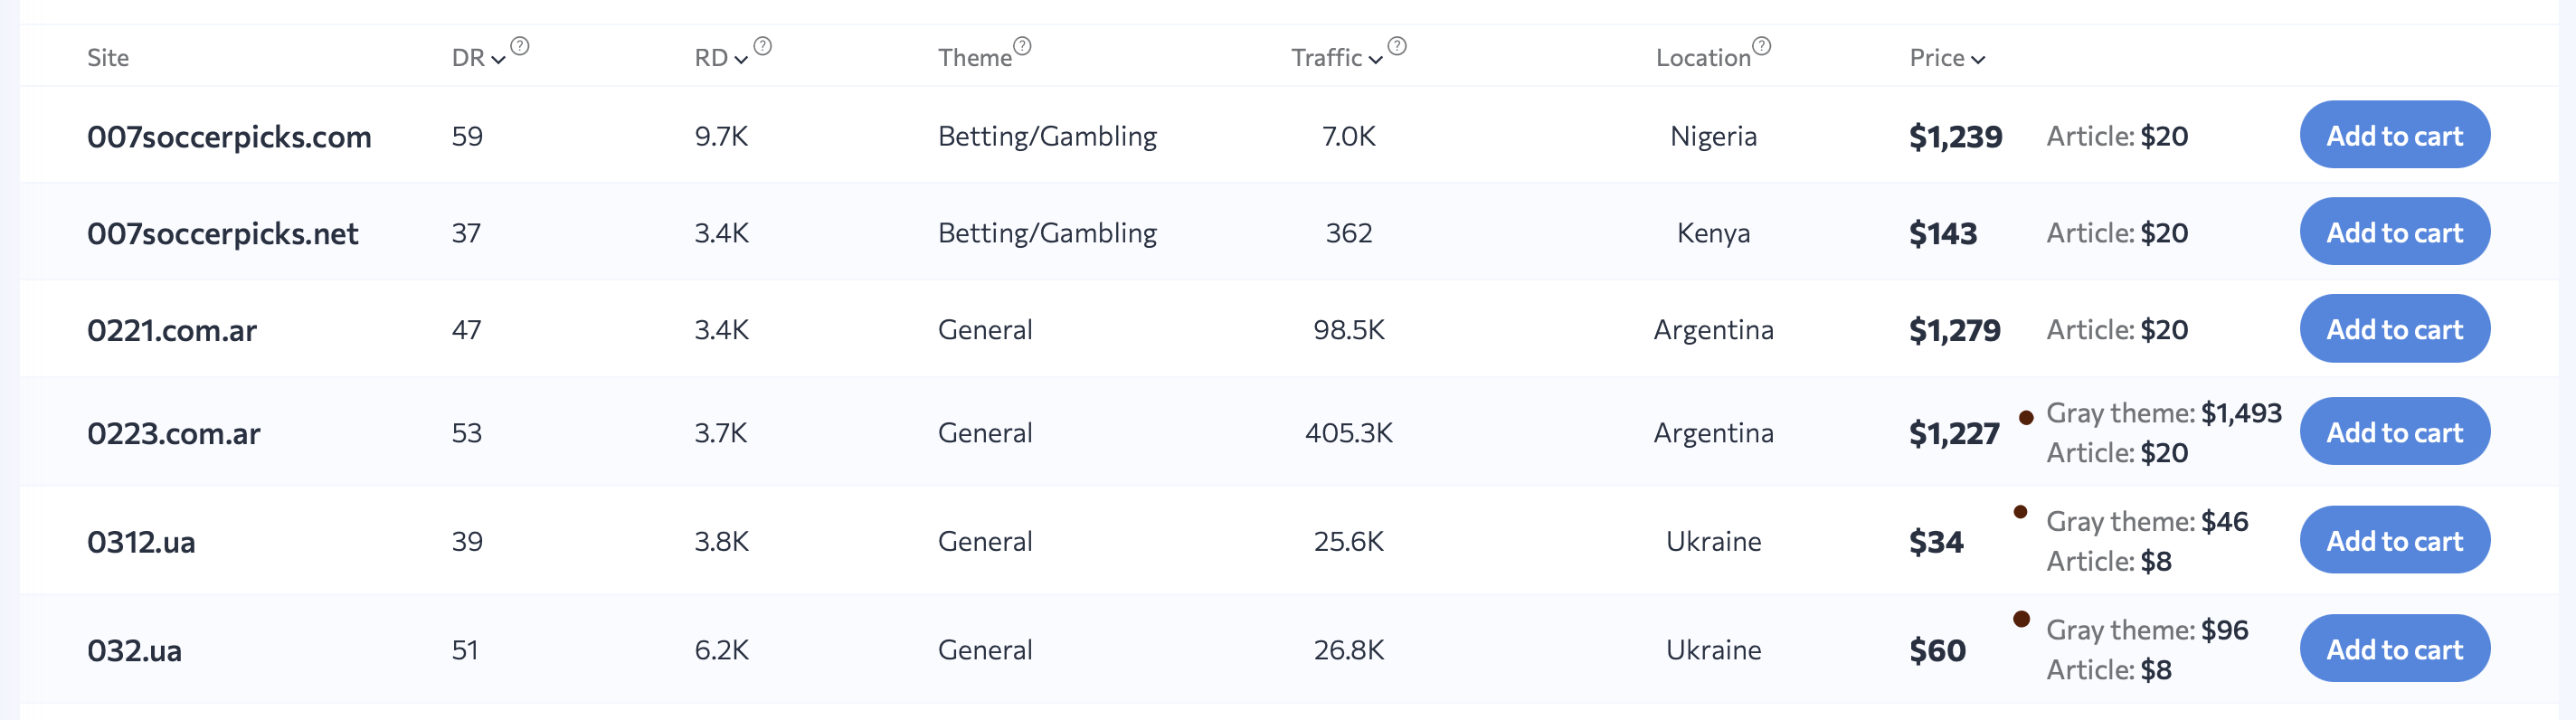
Sort the domains marked as Gray theme. This will help you quickly find suitable platforms for placing links on cannabis-related topics.
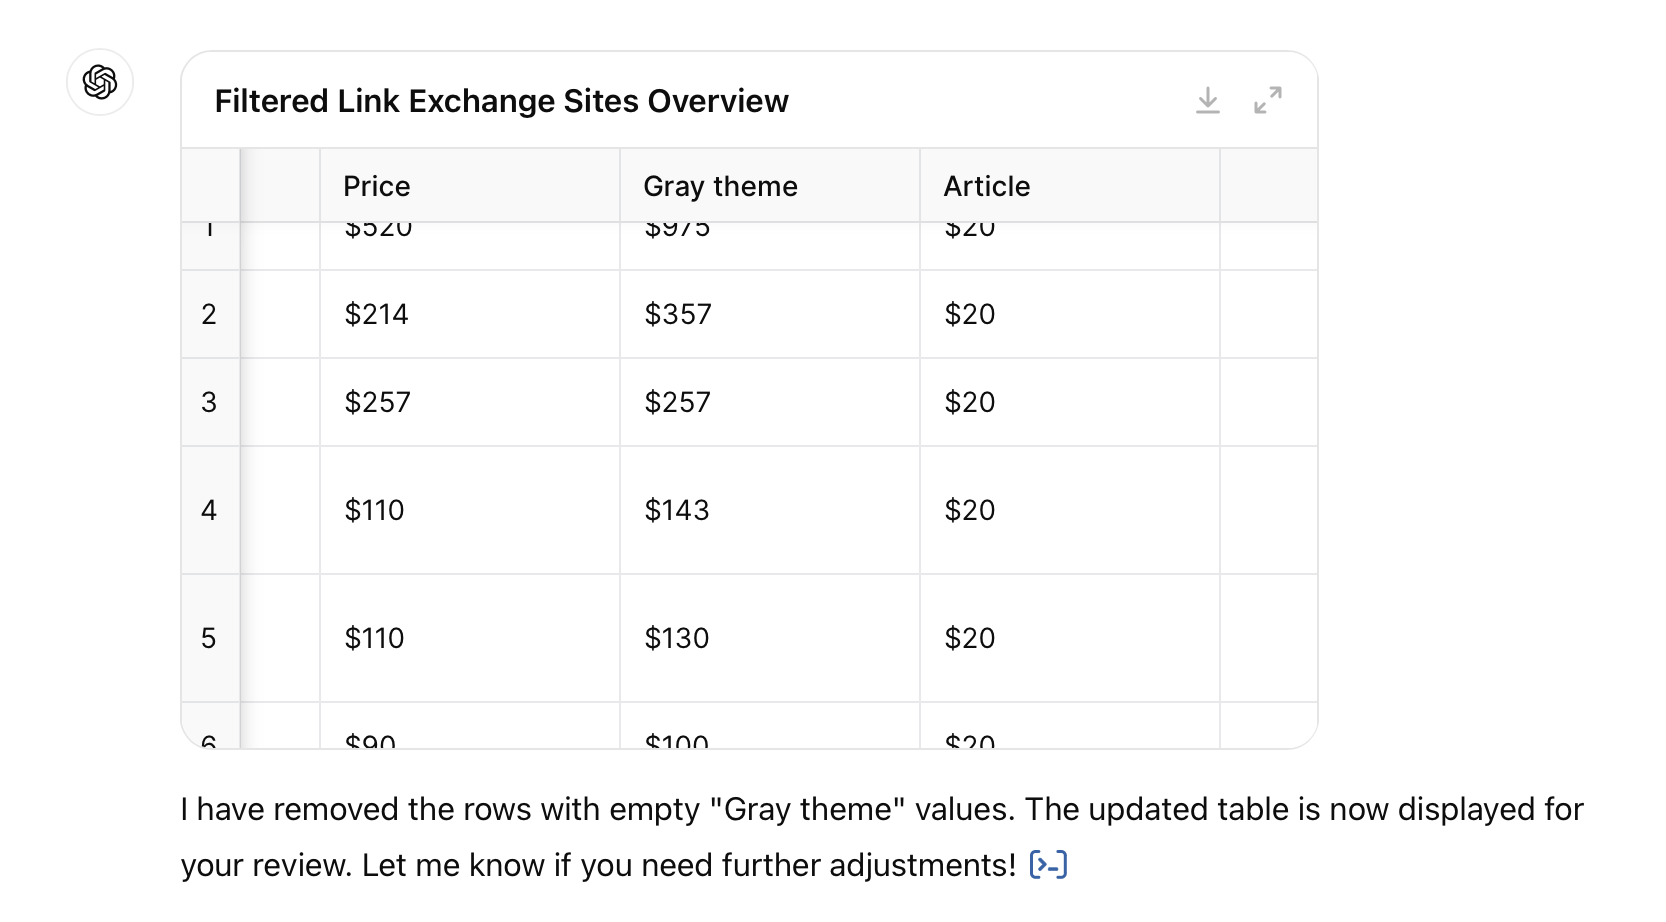
Third step: Then you will see the table, but some will have empty cells in the Gray theme column. For this column, you need to write the following task "remove empty cells." Here is what you will get:
Analyze the selected domains for price, traffic, and relevance to choose the best options.

Not clear notifications. What is the purpose of this update? What is going on with it? It's even annoying.
And a very slow and unclear interface. They are trying to change it, but only complicate it even more. Some buttons may simply not work. In the end, you are like a tester for them, if you do not stand aside and write all the complaints to the support. The support is super!
Links-Stream.com encourages users who leave reviews or become partners of the platform. This may include additional discounts or bonuses for active service use. If you want to get discounts use my links and codes:
https://office.links-stream.com/registration/pDFEf124
Promo code: pDFEf124
If you need to purchase up to 5 links per month, Links-Stream will be an excellent assistant. The platform provides convenient solutions for small campaigns and a user-friendly interface. The support on the platform is among the best I have experienced!
Table of contents
Backlinks account for 50% of all work on external site optimization to improve its positions in search engines such as Google, helping them become more visible.
The SEO cannabis and CBD industry is characterized by its specific laws and market conditions, creating both unique opportunities and challenges for those working on website search engine optimization in this area. In this article, I will detail all the pitfalls you might encounter when searching for cannabis link building for your project.
Over the last five years, many countries have made significant changes to their legislation regarding cannabis, both in terms of legalization and allowing medical use.
Here are some of the key changes:
These changes reflect a broad trend toward recognizing both the medical and socio-economic aspects of cannabis legalization. Meanwhile, each country adopts different approaches and models, taking into account their unique social, cultural, and legal contexts.
High-quality cannabis backlinks are links from authoritative, thematically relevant sites with a high Domain Rating (DR) of 45 or higher (although each SEO specialist may determine this according to their project). They must be natural, not purchased, and match the content of the page they lead to. The site traffic should not be less than 1,000 visitors (this is the minimum), also check to ensure that the site's traffic graph is not volatile.
Low-quality links can be obtained from suspicious sites, spam sites, or bought in large quantities, which can lead to penalties from search engines.
Building links for cannabis-related websites presents unique challenges.
Based on my experience, not all link buying platforms are created equal, especially in the niche cannabis and CBD link building. I tested 20 cannabis link buying exchanges and platforms. Here are some platforms where buying links can be profitable, and others to avoid:
Bazoom: An exchange where it is immediately clear whether a domain accepts guest posts on the topic of cannabis, which is very convenient. If the admin requests an increased cost due to the theme, this will also be clearly shown.
There is a deal for new clients; register via this link https://app.bazoom.com/refer?ref=PFOd8lweLf7ISBBw and receive 100 euros in your account!
This is a unique offer not available on other exchanges.

Links-Stream: An exchange with a slightly inconvenient interface, but one can get used to it. There is a more detailed article about this exchange available here.
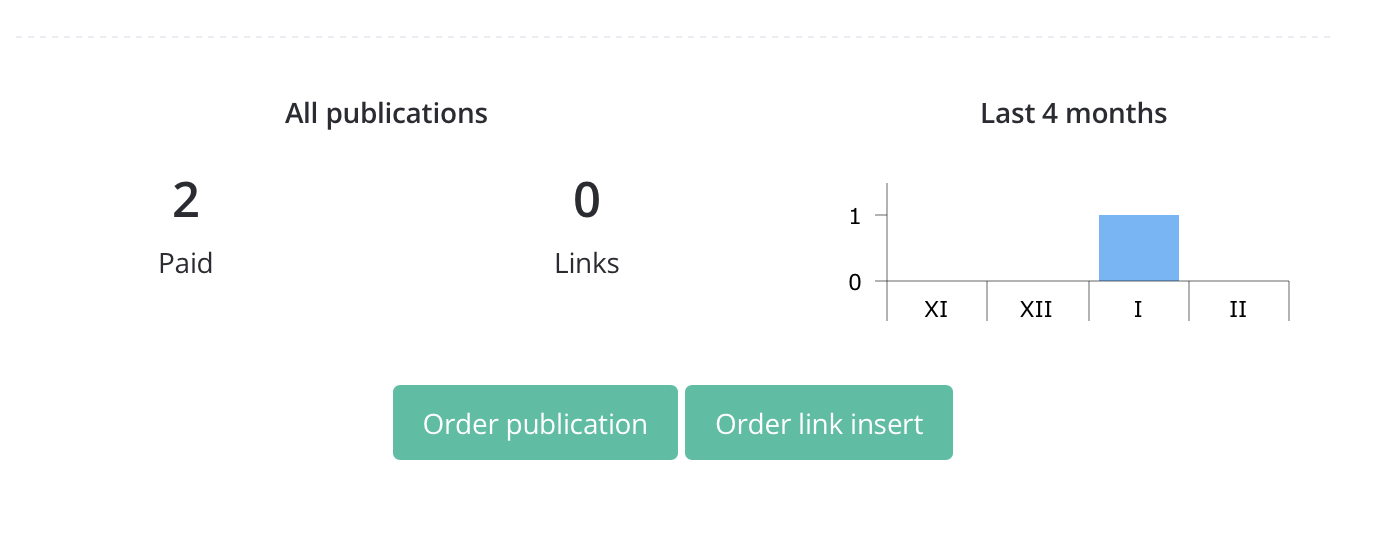
I managed to place many links; out of 60 domains, 10-15 sites accepted cannabis links.
It has the best support of any exchange I have used.

Adsy: A very large database of websites. If you can't find the domain you need anywhere else, it's likely to be here.
The problem is that the brokers offering placements often remain silent and do not communicate whether the process is ongoing or not; you have to ask yourself.
Visit this link for more information: https://ref.adsy.com/?ref=referral&ref_type=direct&ref_id=9oevv548urkdgdls&ref_item=3
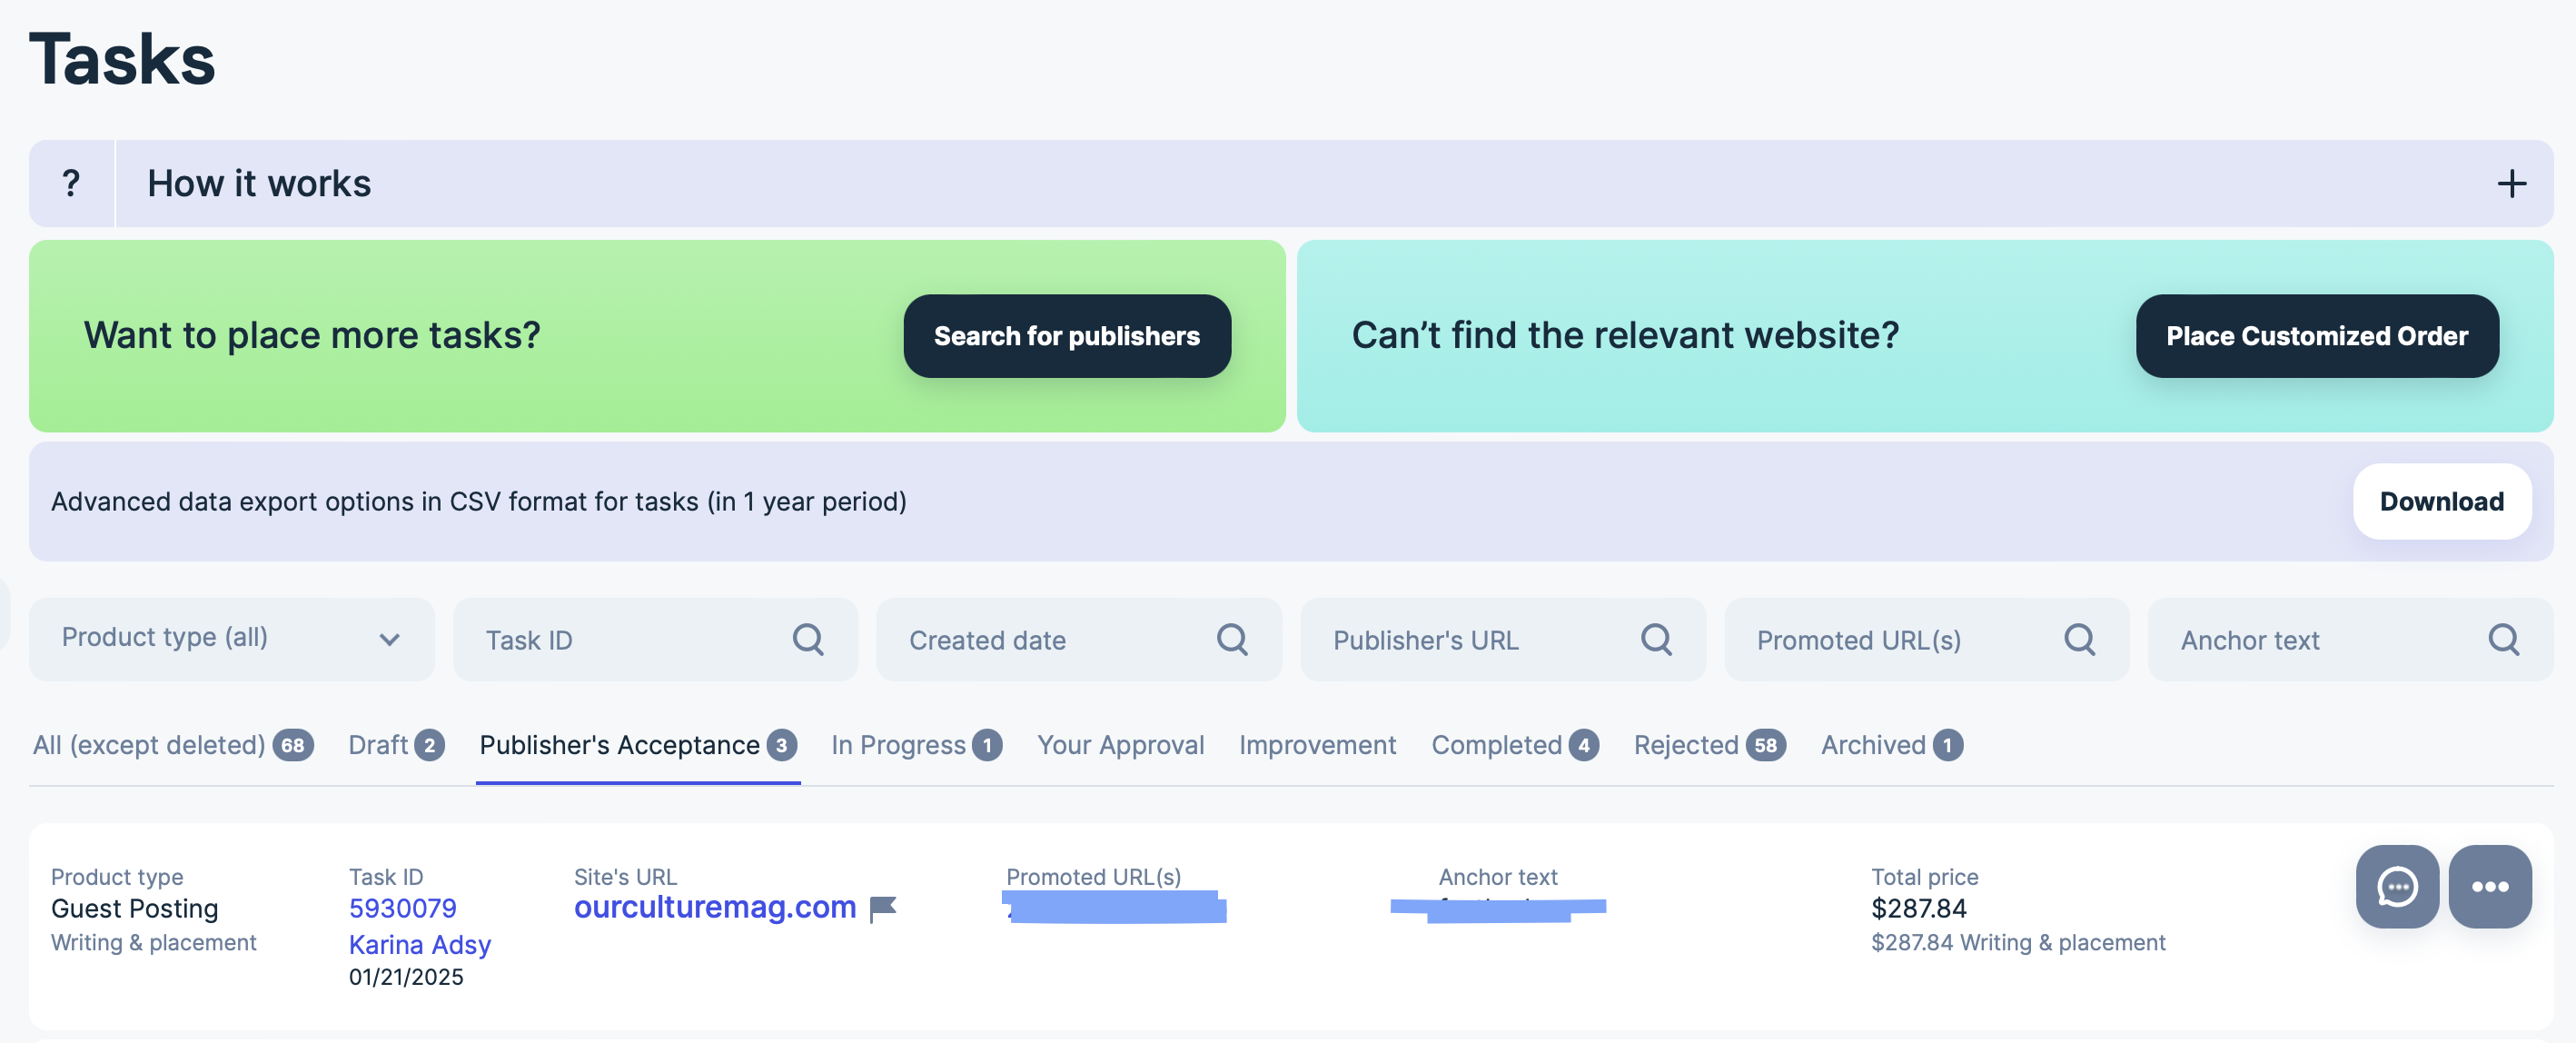
Icopify: A pleasant exchange that writes text for $30 - $50, but out of 80 sites where I wanted to place guest posts, only 2 accepted. Brokers often remain silent and do not communicate anything.
Growwer: Frequently rejects content related to cannabis.
Serppro: Often declines content associated with cannabis.
Hat Joye: This exchange does not show domains upfront. After 10 days, they send you one domain they have selected based on your criteria, and it may not be suitable for your site at all. If you are looking for only high-quality links and double-check what is offered, this can be frustrating. After placing an order, I asked for a refund and have not used it anymore as it was a waste of time.
is a versatile service that offers several key features:
More about this service in my article "How to get SEO Backlinks Cheap? Linkdetective.pro"
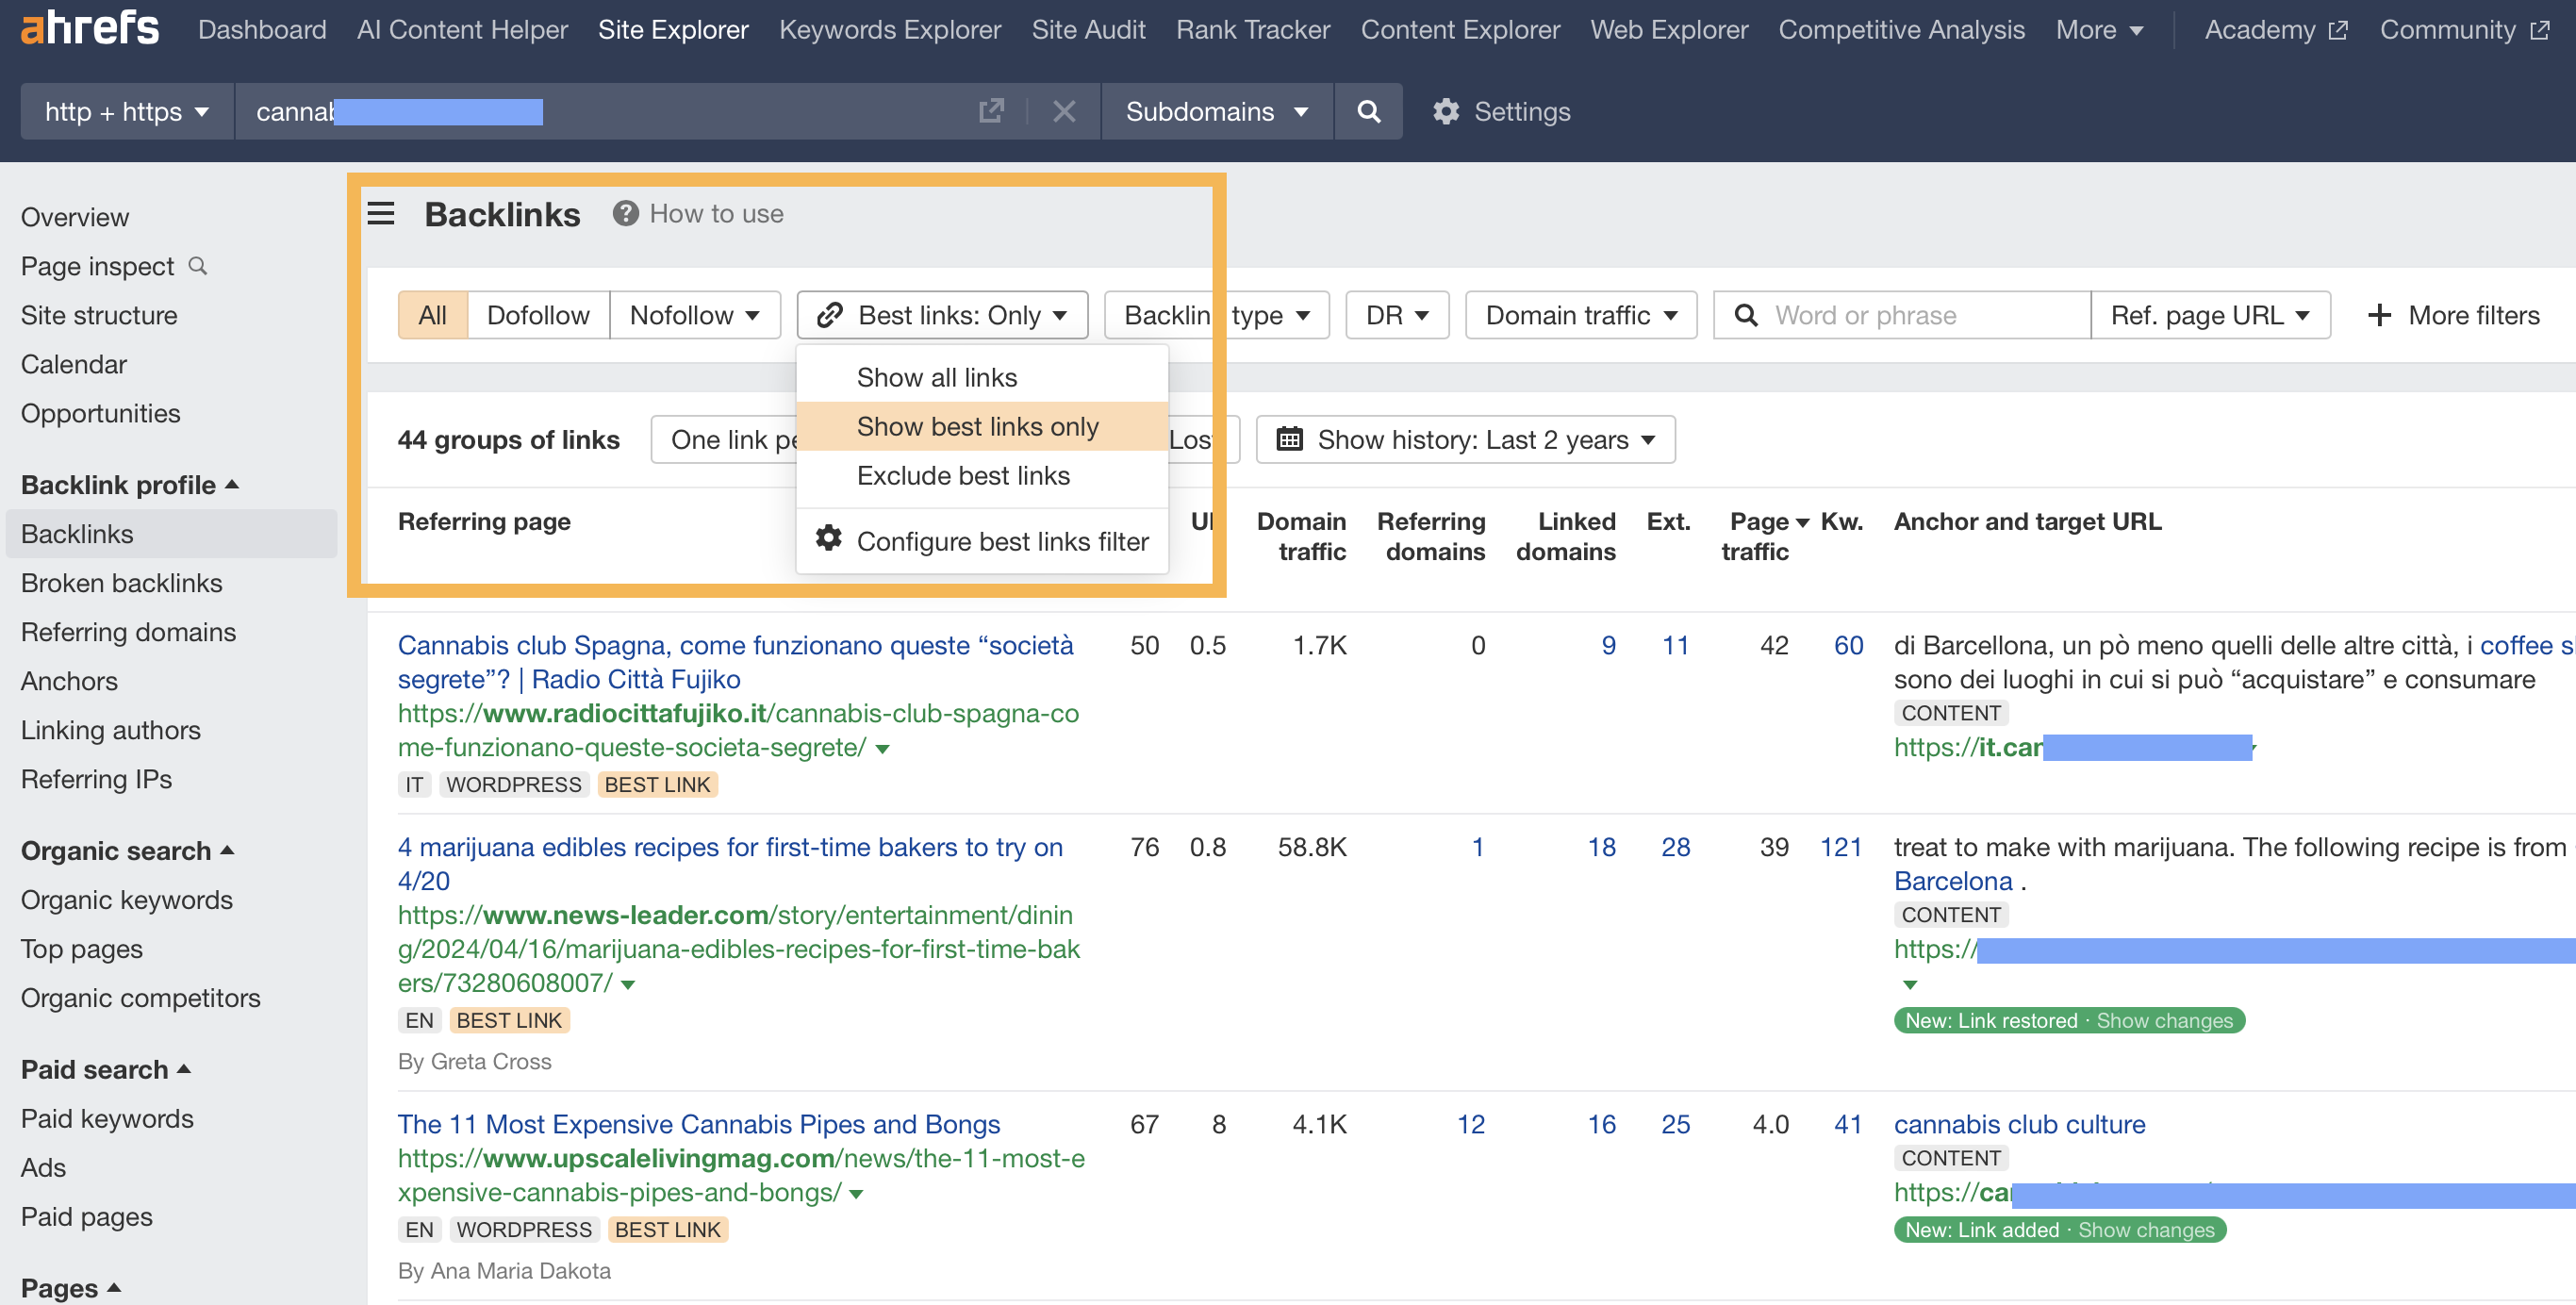
Analyzing competitor backlinks is a crucial strategy for enhancing your SEO performance. Ahrefs is a powerful tool that allows you to conduct a comprehensive analysis of your competitors' backlinks, offering insights that can help refine your own link-building strategy. Here’s a quick guide on how to use Ahrefs to analyze competitor links effectively.
To be continued…
Legal restrictions related to cannabis content vary depending on the country or region, as cannabis legislation differs significantly worldwide. Below are the main reasons why websites may refuse to place links to cannabis-related content:
In many countries, cannabis, especially for recreational use, remains completely illegal. This includes its use, sale, or dissemination of information about its cultivation, seeds, and products. If a website is based in a country or region where cannabis is prohibited, its owners may avoid linking to such content to prevent violating local laws.
In countries where cannabis is only permitted for medical use (such as Germany, Poland, and several U.S. states), there are strict licensing and regulatory requirements for the distribution of this information. Some websites may avoid cannabis-related content if it does not comply with strict regulations or could be perceived as advertising.
Many countries that have legalized cannabis for medical or recreational use still have strict advertising regulations. In some regions, promoting cannabis is entirely prohibited, which includes linking to articles, blogs, or other online formats. Even links to pages that could be considered advertising cannabis products may violate local laws.
Regardless of legal regulations, many major online platforms and services, such as Facebook, Google Ads, or some news sites, have established their own rules prohibiting or restricting cannabis-related content and links. These companies aim to avoid topics that could lead to legal disputes or violate the rights of certain users.
Some websites may avoid cannabis content for reasons related to their audiences or social stance. Owners of sites focused on conservative or family values may not want to associate their brand with topics related to cannabis use.
Legal restrictions on cannabis vary greatly depending on local legislation, and websites may face different rules based on their jurisdiction or internal policies. To successfully place links to cannabis-related content, it is important to consider not only the laws but also the policies of the websites you are working with.
Table of contents
In the world of SEO, having quality links is important, but so is their cost, especially if you plan to run large-scale linkbuilding campaigns. Linkdetective.pro is a specialized tool that helps you find the best deals on the link market by analyzing and comparing prices. This is a valuable service for both beginners and experienced SEO specialists who want to optimize link acquisition costs without sacrificing efficiency. Here’s how you can get backlinks cheap and ensure they are of high quality with Linkdetective.pro.
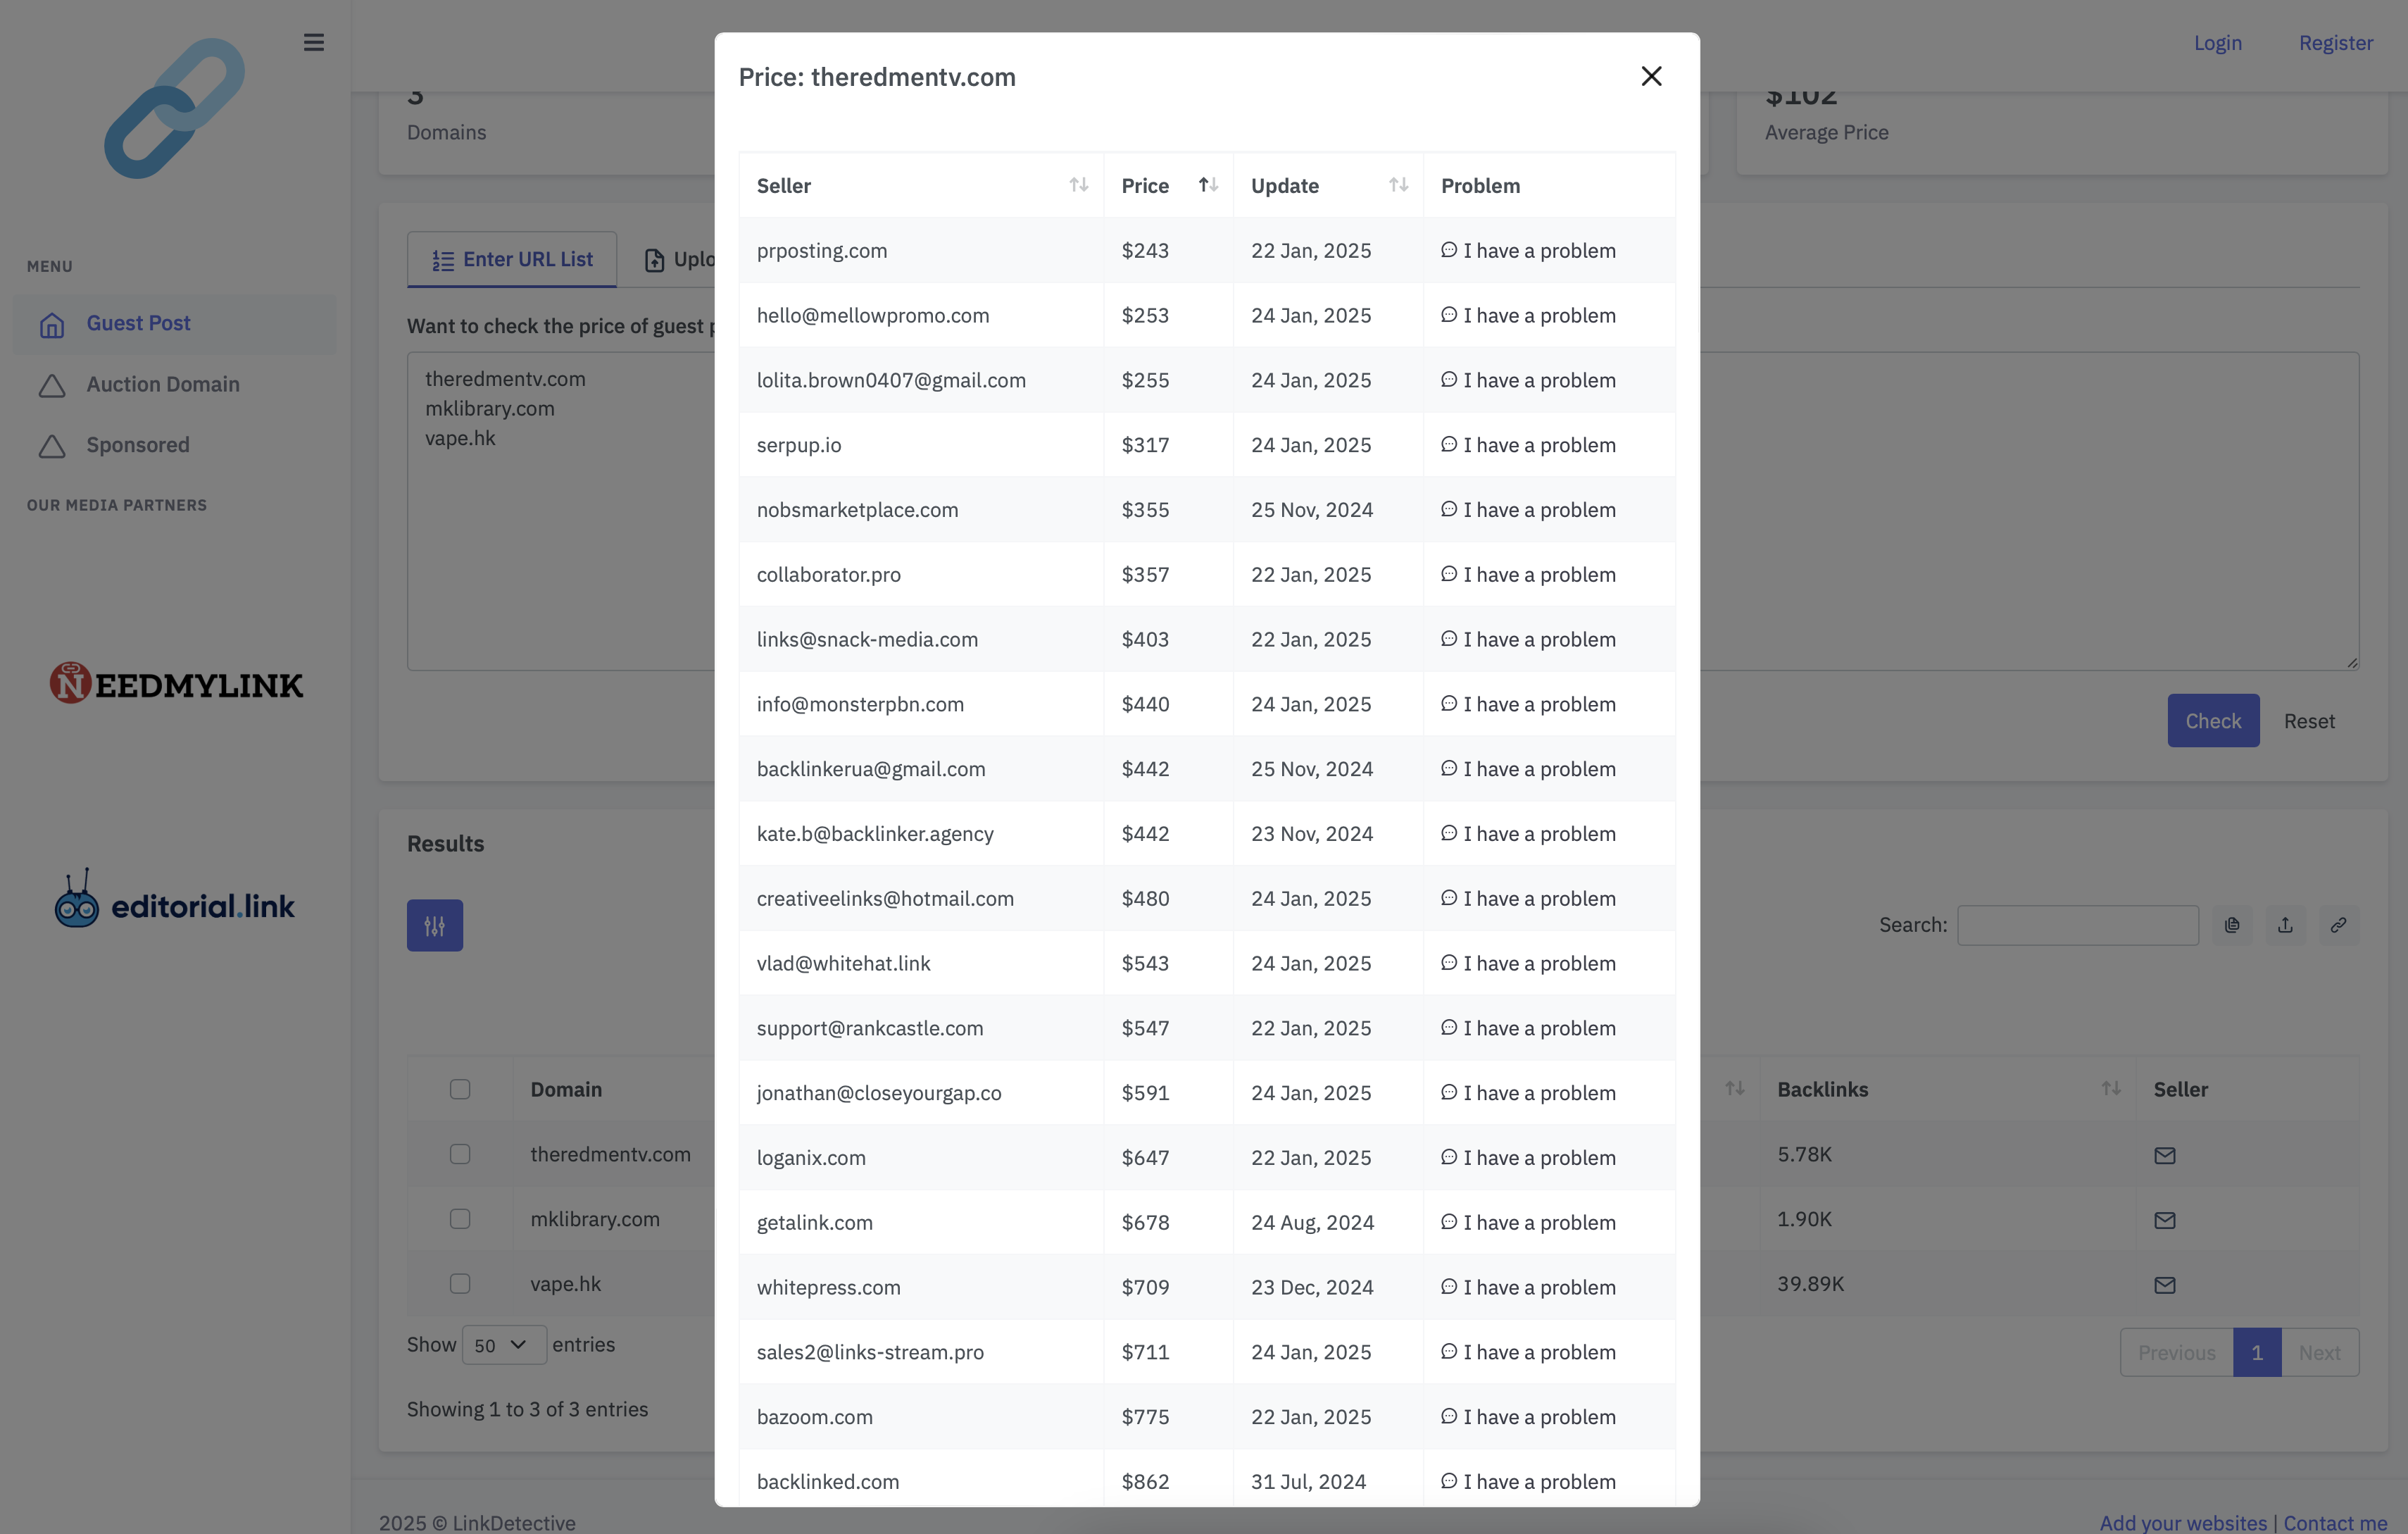
Linkdetective.pro is designed to analyze link prices from different sources and platforms. It simplifies the process of finding the best deals and saves your time by automating routine tasks. The service works according to the following main principles:
To get the most out of Linkdetective.pro, follow these recommendations:
Linkdetective.pro is a powerful tool for those looking to optimize link-buying costs while maintaining high effectiveness in their SEO campaigns. It helps you find the cheapest offers on the market, compare them with alternatives, and make data-driven decisions. With this service, you can not only save money on link acquisition but also ensure steady growth in your site’s search engine rankings.
Table of contents
The digital landscape for cannabis businesses is fraught with challenges, especially when it comes to advertising. While the legal status of cannabis, including products like marijuana seeds, is evolving across many regions, online platforms continue to impose strict restrictions on cannabis-related advertising. This makes it difficult for businesses to reach their target audiences through traditional digital marketing channels. However, innovative strategies and specialized cannabis digital marketing agencies are helping to navigate these obstacles effectively.
Major online platforms like Google, Facebook, and Instagram have stringent policies against the advertisement of cannabis and related products. These restrictions are largely due to the varying legal status of cannabis across different regions and the platforms' desire to avoid legal complications. As a result, ads that promote cannabis products, including marijuana seeds, are often rejected or banned outright. This limits the visibility of cannabis businesses and restricts their ability to engage with potential customers through paid online advertising.
Despite these challenges, there are several strategies that cannabis businesses can employ to overcome online ad restrictions:
Navigating the complexities of cannabis advertising requires specialized knowledge, and this is where cannabis digital marketing agencies come into play. These agencies are experts in the unique challenges of the cannabis industry and have the experience needed to develop effective marketing strategies that comply with legal requirements while maximizing reach and engagement.
For example, a cannabis digital marketing agency can help businesses optimize their content, manage SEO, and implement compliant ad campaigns. They can also assist in building relationships with influencers and exploring alternative advertising networks that are more cannabis-friendly.
While online cannabis advertising is challenging due to strict platform policies, it is far from impossible. By leveraging content marketing, SEO, influencer partnerships, and the expertise of cannabis digital marketing agencies, businesses can successfully promote their products, including marijuana seeds, and connect with their target audience. As the industry continues to evolve, staying informed and adaptable will be key to overcoming these restrictions and achieving marketing success in the digital space.
To check the reputation of the IP address from which emails are sent, you can use the following methods:
nslookup Command: You can use the nslookup command to check IP addresses against certain blacklists. For example:
nslookup -q=TXT 1.0.0.127.bl.spamcop.net
Here, 1.0.0.127 is the reversed IP address 127.0.0.1.
Checking the reputation of your IP address and domain using these tools and services will help you identify any issues with reputation and how to resolve them to improve the deliverability of your emails.
Table of contents
Obtaining free backlinks for your website can significantly improve its visibility in search engines and increase traffic. Here are several effective methods to help you get free backlinks: